Summary
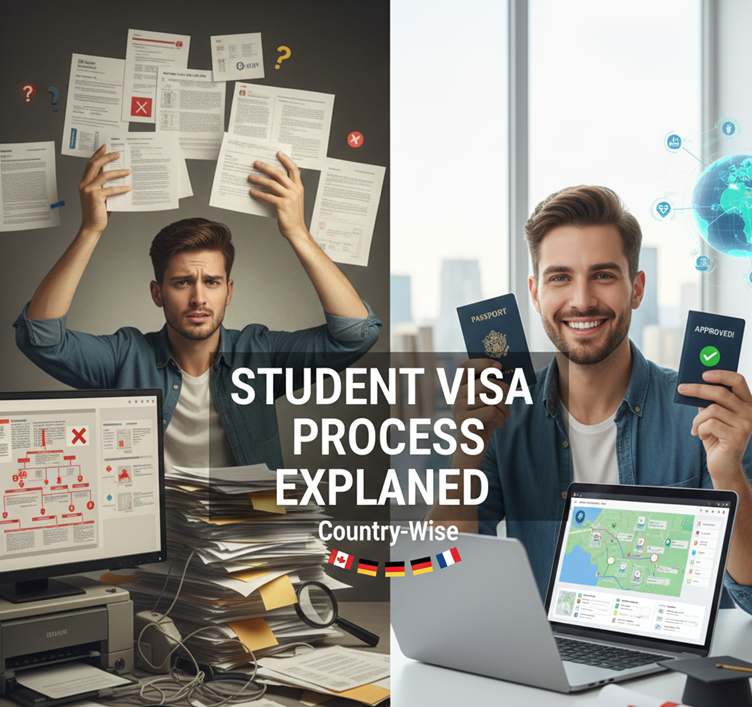
Dreaming of studying abroad but feeling overwhelmed by visa paperwork? You’re not alone. Getting a student visa can feel like navigating a maze blindfolded, but here’s the good news: once you understand the process, it’s totally manageable. This guide breaks down the student visa process for the most popular study destinations—USA, UK, Canada, Australia, and Germany. We’ll walk you through each country’s requirements, timelines, costs, and insider tips that actually matter. Whether you’re eyeing an Ivy League education or a cozy European campus, we’ve got you covered.
Why Understanding the Visa Process Matters (And Why You Should Start Early)
Let’s be real—nobody dreams about filling out visa forms when they imagine their study abroad journey. You’re probably picturing yourself exploring new cities, making international friends, and building an amazing career. But here’s the thing: your student visa is literally your golden ticket to making all of that happen.
Starting early isn’t just smart; it’s essential. Visa processing times can range from a few weeks to several months, and trust me, you don’t want to miss your semester start date because of a missing document or a delayed appointment. Plus, gathering all the paperwork takes time—financial statements, acceptance letters, health checks, and more.
Think of the visa process as the first real test of your study abroad journey. If you can handle this, you can handle anything that comes your way!
United States: The F-1 Student Visa Journey
What You Need to Know First
The United States remains one of the top destinations for international students, and the F-1 visa is your gateway to American universities. Around 1 million international students choose the US each year, so you’ll be in good company.
Step-by-Step Process
1. Get Your I-20 Form Before you even think about applying for a visa, you need to be accepted by a SEVP-approved school. Once accepted, your university will send you an I-20 form—this is basically your official invitation to study in the US. Keep this document safe; you’ll need it throughout your entire visa process.
2. Pay the SEVIS Fee The Student and Exchange Visitor Information System (SEVIS) fee is mandatory. As of now, it’s $350. Pay this online at fmjfee.com and keep your receipt. You’ll need to show proof of payment during your visa interview.
3. Complete the DS-160 Form This is your online visa application. Set aside a good hour or two to fill this out carefully. Have your passport, travel details, and I-20 handy. The form will generate a confirmation page with a barcode—print this out and bring it to your interview.
4. Schedule Your Visa Interview Book your appointment at the nearest US Embassy or Consulate. During peak season (May to August), slots fill up fast, so schedule this at least 2-3 months before your program starts.
5. Prepare Your Documents You’ll need:
- Valid passport (must be valid for at least 6 months beyond your stay)
- DS-160 confirmation page
- I-20 form
- SEVIS fee receipt
- Visa application fee receipt (currently $185)
- Recent photograph (meeting US visa photo requirements)
- Academic documents (transcripts, diplomas, test scores)
- Financial proof (bank statements, scholarship letters, sponsor affidavits)
- Any other supporting documents
6. Ace Your Visa Interview This is where many students get nervous, but don’t be. The visa officer wants to confirm three main things: you’re a genuine student, you can afford your education, and you plan to return home after your studies. Be honest, confident, and concise. Speak clearly about your chosen program, why that specific university, and your career plans.
Timeline and Costs
- Processing time: Typically 3-5 weeks after the interview, but can vary
- Total cost: Approximately $535 ($185 visa fee + $350 SEVIS fee)
- When to apply: You can apply up to 120 days before your program start date
Pro Tips for US Student Visa
- Show strong ties to your home country (family, property, job prospects)
- Be specific about your post-graduation plans
- Organize your financial documents clearly—visa officers appreciate preparation
- If you’re planning to work on campus, mention it confidently (it’s allowed for F-1 students)
- Don’t memorize answers; be natural and conversational
United Kingdom: Your Tier 4/Student Visa Guide
The British System Simplified
The UK has revamped its student visa system, making it more streamlined than before. Whether you’re heading to Oxford, Cambridge, or any other UK institution, the process is relatively straightforward once you know the steps.
Step-by-Step Process
1. Receive Your CAS Number Once you accept an offer from a UK institution, they’ll issue you a Confirmation of Acceptance for Studies (CAS). This unique 14-character reference number is crucial—it’s like your digital acceptance letter that links to all your course details.
2. Check Your Eligibility You need to prove:
- You have enough money to cover tuition and living expenses
- You’re a genuine student
- You meet English language requirements (usually IELTS, TOEFL, or PTE)
3. Apply Online Complete your application on the UK government’s visa website. You’ll create an account, fill in your details, and pay the visa fee.
4. Pay the Immigration Health Surcharge (IHS) Here’s something unique about the UK: you’ll pay an Immigration Health Surcharge as part of your application. This gives you access to the National Health Service (NHS) during your stay. It’s typically £470 per year.
5. Book Your Biometrics Appointment You’ll need to visit a Visa Application Centre to provide your fingerprints and photograph. Bring your passport and appointment confirmation.
6. Submit Your Documents Required documents include:
- Valid passport
- CAS number
- Proof of financial support (showing you can cover tuition + £1,334 per month for living expenses in London, or £1,023 per month outside London)
- Academic qualifications and English language test results
- Tuberculosis test results (if you’re from certain countries)
- Parental consent (if you’re under 18)
Timeline and Costs
- Processing time: Usually 3 weeks for applications outside the UK
- Total cost: Approximately £490 visa fee + IHS (varies by course length)
- When to apply: Up to 6 months before your course starts
Pro Tips for UK Student Visa
- The 28-day rule: Your bank statements must show you’ve held the required funds for at least 28 consecutive days
- Scan everything: The UK system is increasingly digital, so have clear scans of all documents
- English test validity: Ensure your test is from an approved provider and taken within the required timeframe
- Keep your CAS details accurate: Double-check everything matches your application
Canada: The Study Permit Path
Why Canada’s Process Is Different
Canada doesn’t call it a “student visa”—it’s a “study permit.” And here’s the cool part: once you have your study permit, you can work part-time on campus without any additional paperwork. Canada welcomed over 800,000 international students recently, and they’ve made the process pretty student-friendly.
Step-by-Step Process
1. Get Your Letter of Acceptance First things first: you need an acceptance letter from a Designated Learning Institution (DLI). Not all Canadian schools are DLIs, so verify this when choosing your institution.
2. Gather Your Financial Proof Canada wants to ensure you can support yourself. You’ll need to show:
- Proof of tuition payment or ability to pay
- CAD $20,635 for living expenses (if studying outside Quebec)
- CAD $31,638 if studying in Quebec
- Additional funds for family members if they’re coming with you
3. Apply Online or on Paper Most students apply online through IRCC (Immigration, Refugees and Citizenship Canada). Create an account, complete the forms, and upload your documents. Paper applications are also accepted but take longer.
4. Provide Biometrics You’ll need to give your fingerprints and photo at a Visa Application Centre. This costs CAD $85.
5. Submit Required Documents Your application package should include:
- Proof of acceptance from a DLI
- Proof of identity (valid passport)
- Proof of financial support
- Letter of explanation (explaining your study plans and why Canada)
- Medical exam results (if required)
- Police certificates (if required)
- Digital photo
6. Wait for Your Study Permit If approved, you’ll receive a Port of Entry (POE) Letter of Introduction. You’ll get your actual study permit when you arrive in Canada at the airport.
Timeline and Costs
- Processing time: Varies by country, typically 4-6 weeks, but can be longer
- Total cost: CAD $150 study permit fee + CAD $85 biometrics
- When to apply: As soon as you receive your acceptance letter
Pro Tips for Canadian Study Permit
- Provincial Attestation Letter (PAL): As of 2024, most students need this additional document from the province where they’ll study
- Medical exam: Get this done by a panel physician approved by Canada
- Strong study plan: Explain clearly why you chose your program and how it fits your career goals
- Show intent to return: Demonstrate ties to your home country
- Check processing times: They vary significantly by country—check regularly on the IRCC website
Australia: The Subclass 500 Student Visa
The Australian Advantage
Australia’s student visa process has become more streamlined with the Genuine Student (GS) requirement replacing the older GTE. With world-class universities and a fantastic lifestyle, Australia attracts hundreds of thousands of international students each year.
Step-by-Step Process
1. Receive Your CoE After accepting an offer and paying your initial tuition deposit, your Australian institution will issue a Confirmation of Enrolment (CoE). This is your ticket to applying for the visa.
2. Create an ImmiAccount Apply online through Australia’s Department of Home Affairs. Create an ImmiAccount where you’ll complete your application and track its progress.
3. Complete the Genuine Student Statement This is crucial. You’ll write a statement (up to 300 words) explaining:
- Why you chose Australia and your specific course
- How this course benefits your future
- Your circumstances in your home country
- Any other relevant information
Be genuine and specific here—this is your chance to tell your story.
4. Prove Your Financial Capacity You need to show you can cover:
- Tuition fees
- Living costs (approximately AUD $24,505 per year)
- Travel costs
- Costs for family members if they’re joining you
5. Meet Health and Character Requirements
- Get health insurance (Overseas Student Health Cover – OSHC)
- Undergo medical examinations if required
- Provide police clearances from countries where you’ve lived for 12+ months in the past 10 years
6. Submit Your Application Upload all required documents:
- Valid passport
- CoE
- Genuine Student statement
- Financial evidence
- OSHC confirmation
- English proficiency test results (IELTS, PTE, TOEFL)
- Academic transcripts and certificates
- Health and character documents
Timeline and Costs
- Processing time: Typically 4-6 weeks, but can vary
- Total cost: AUD $710 for the main applicant
- When to apply: At least 6 weeks before your course starts, but no more than 124 days before
Pro Tips for Australian Student Visa
- English requirements vary: Check your institution’s specific requirements
- OSHC is mandatory: Purchase this for your entire stay before applying
- Be truthful in your Genuine Student statement: They’re looking for authenticity, not perfection
- Work rights included: Your visa allows you to work up to 48 hours per fortnight during sessions
- Keep digital copies: The entire process is online, so keep everything organized digitally
Germany: The Student Visa for Europe’s Education Hub
Understanding Germany’s System
Germany is unique—many public universities charge little to no tuition fees, making it incredibly attractive for international students. The visa process is thorough but manageable, especially if you’re organized.
Step-by-Step Process
1. Get Accepted (or Apply for a Language Course) You’ll need:
- An admission letter from a German university (for degree programs), OR
- Proof of enrollment in a language course (if you’re doing a preparatory language program)
- If applying from abroad without full admission, you might need to apply for a student applicant visa first
2. Open a Blocked Account (Sperrkonto) Here’s what makes Germany different: you need to deposit approximately €11,208 (for 2024) into a blocked German bank account before applying. This proves you can support yourself. You can withdraw about €934 per month during your stay. Services like Fintiba or Deutsche Bank offer blocked accounts for international students.
3. Get Health Insurance You need German health insurance before you apply. You have two options:
- Public health insurance (around €110 per month for students)
- Private health insurance (must meet specific requirements)
4. Book Your Visa Appointment Contact the German Embassy or Consulate in your country to schedule an appointment. This can take weeks or even months during peak season, so book early!
5. Prepare Your Documents The German system is thorough. Bring:
- Completed visa application form
- Valid passport (with at least 6 months validity)
- Passport photos (biometric)
- University admission letter or language course enrollment
- Blocked account confirmation
- Health insurance certificate
- Proof of academic qualifications
- Motivation letter explaining your study plans
- Curriculum Vitae (CV)
- Proof of German or English language proficiency (depending on your program)
6. Attend Your Visa Interview Be prepared to discuss your study plans, why Germany, and your academic background. The interview is usually straightforward if your documents are in order.
Timeline and Costs
- Processing time: 6-12 weeks (can be longer)
- Total cost: €75 for the visa application
- When to apply: At least 3 months before your planned departure
Special Considerations for Germany
Student Applicant Visa vs. Student Visa
- If you don’t have full admission yet, apply for a student applicant visa (allows 3 months in Germany to complete admission formalities)
- Once admitted, convert it to a full student visa inside Germany
Language Requirements
- For German-taught programs: Usually need TestDaF or DSH
- For English-taught programs: IELTS or TOEFL
- Some preparatory courses require proof of basic German (A1 or A2 level)
Pro Tips for German Student Visa
- Start early: German bureaucracy is efficient but takes time
- Translation requirements: Some documents may need to be translated to German by certified translators
- Blocked account takes time: Opening one can take 2-3 weeks, so don’t wait until the last minute
- Embassy requirements vary: Check your specific embassy’s requirements as they can differ slightly by country
- Proof of accommodation: While not always required at application, having a rental contract or dorm confirmation helps
- Schengen bonus: Your German student visa lets you travel throughout the Schengen Area
Common Mistakes to Avoid (No Matter Which Country You Choose)
Let’s talk about the things that trip up even the smartest students:
1. Waiting Until the Last Minute
I can’t stress this enough. Visa processing times are estimates, not guarantees. Things can go wrong—documents get lost, appointments get rescheduled, medical exams take longer than expected. Give yourself at least 3-4 months of buffer time.
2. Incomplete Financial Documentation
This is the number one reason for visa rejections. Make sure your financial documents are:
- Recent (usually within the last 3-6 months)
- Clearly showing the required amounts
- Properly notarized if needed
- Accompanied by source of funds explanation
If your parents are sponsoring you, include their employment letters, tax returns, and a sponsorship affidavit.
3. Inconsistent Information
Everything you submit should tell the same story. If your DS-160 says you’re studying Computer Science but your university letter says Business Administration, that’s a red flag. Double-check everything matches.
4. Poor Interview Performance
Being nervous is normal, but being unprepared is avoidable. Practice common questions:
- Why this university?
- Why this country?
- What are your career goals?
- How will you fund your education?
- Why should we believe you’ll return home?
Be honest and confident. If you don’t know something, it’s okay to say so.
5. Ignoring Medical Requirements
Some countries require specific vaccinations or health checks. Don’t skip these or assume they’re optional. Get them done early because results can take time.
6. Not Following Up
After submitting your application, track it regularly. If additional documents are requested, submit them immediately. Check your email (including spam folders) daily for communication from the embassy or consulate.
Your Visa Checklist: Before You Apply
Here’s a master checklist that applies to most countries:
Documents to Prepare:
- Valid passport (check expiry date)
- University acceptance letter
- Financial proof documents
- Academic transcripts and certificates
- Standardized test scores (IELTS, TOEFL, GRE, etc.)
- Passport-sized photographs (check specific requirements)
- Health insurance or medical exam results
- Police clearance certificates (if required)
- Proof of accommodation (if required)
- Statement of purpose or motivation letter
- [ ] Sponsor documents (if applicable)
Action Items:
- [ ] Research specific requirements for your country
- [ ] Create a timeline working backward from your program start date
- [ ] Book visa appointment as early as possible
- [ ] Open required bank accounts or blocked accounts
- [ ] Get required vaccinations or medical exams
- [ ] Prepare for visa interview
- [ ] Make copies of everything (digital and physical)
- [ ] Check visa processing times regularly
After Getting Your Visa: Next Steps
Congratulations! Your visa is approved—now what?
Before You Travel
- Read your visa carefully: Check the validity dates, entry conditions, and any restrictions
- Book your flight: Don’t book until you have your visa in hand
- Arrange accommodation: If you haven’t already, secure your first few weeks’ accommodation
- Notify your university: Let them know you’re confirmed and when you’ll arrive
- Plan your finances: Notify your bank about international travel, consider getting an international debit card
- Pack smart: Include all original documents in your carry-on luggage
At the Port of Entry
- Have all documents easily accessible
- Be prepared to answer questions about your study plans
- Stay calm and confident
- For some countries (like Canada), you’ll receive your actual permit at the airport
After Arrival
- Register with local authorities if required
- Open a local bank account
- Get a local phone number
- Register at your university
- Understand your visa conditions (work restrictions, travel limitations)
- Keep your documents safe and make copies
Frequently Asked Questions
Can I work while studying?
- USA: Yes, up to 20 hours/week on campus after your first academic year
- UK: Yes, up to 20 hours/week during term time
- Canada: Yes, up to 20 hours/week off-campus without additional permits
- Australia: Up to 48 hours/fortnight during sessions, unlimited during breaks
- Germany: Yes, 120 full days or 240 half days per year
What if my visa is rejected? Don’t panic. You can usually reapply. First, understand why it was rejected—sometimes it’s just missing documents. Address the issues and apply again. Consider consulting an immigration advisor if you’re unsure.
Can my family visit me? Yes, most countries allow visitors. They’ll need to apply for a visitor/tourist visa separately. Some countries also offer dependent visas for spouses and children.
Can I extend my student visa? Usually yes, if you’re continuing your education or doing an additional program. Apply for an extension before your current visa expires.
Do I need to maintain a minimum attendance or grades? Absolutely. Most student visas require you to maintain full-time enrollment and make satisfactory academic progress. Falling below these standards can jeopardize your visa status.
Final Thoughts: You’ve Got This!
Getting a student visa might seem like climbing a mountain, but thousands of students do it successfully every year—and you will too. The key is preparation, organization, and starting early.
Remember, this visa is more than just paperwork. It’s your passport to incredible experiences, world-class education, and life-changing opportunities. Every form you fill out and every document you gather is a step toward your dream.
Yes, the process can be stressful. Yes, there will be moments when you wonder if it’s all worth it. But when you’re sitting in your first class, meeting students from around the world, and realizing you’re actually doing this—it’ll all make sense.
At EPS.Guru, we’re here to support you through every step of your education journey, from choosing the right program to landing that dream job after graduation. Your adventure starts with this visa, but it’s just the beginning of an incredible chapter in your life.
Got questions about your specific situation? Drop a comment below, and let’s figure it out together. And hey, once you’re settled in your new country, come back and share your experience to help the next wave of students. We’re all in this together.
Safe travels, future global citizen. Your journey awaits!
Need help with university applications, test prep, or career guidance? Explore more resources at EPS.Guru—your partner in education and placement success.